When the transfer is malfunctioning the Hydraloop is unable to transfer the water from the cleaning tanks T1 and T2 to the storage tank T3.
How does the transfer work?
The transfer works by water moving from the cleaning tanks of the Hydraloop (T1 and T2) to the storage tank called T3 through an UV-lamp. As T1 and T2 are located higher than T3, the transfer can happen with the help of only gravity. Often this process can take around 1.5-2.5 hours with full tanks.
You will see in below image a typical transfer. As long as the ‘transfer path’ is on ‘green’, water is being transferred with gravity from T1 to T3. You will notice in the image that initially T1 and T2 both lower together when T3 is raising. When T1 lowers to a point that is too low for the transfer tube to stay under water, the Hydraloop will start creating a zig zag pattern in T1. This effect is the Hydraloop periodically pushing up the water in the T1 tank upwards to be able to continue the transferring of the water to T3. This is normal behavior.

Causes #
This problem can be because of a few causes. Please check the details of these causes in order to figure out which one is probably the case.
Clogged transfer tubing
Problem
As the nature of the Hydraloop system involves biological organisms, over time the walls of the transfer tube has some biological growth. This in combination with fats and other contaminants slowly clog the transfer tubing over the time period of years. We call this material on the walls ‘biofilm’. Normally during preventive maintenance these tubes are cleaned on time. If for some reason this is not the case we have this problem.


To see if the Hydraloop transfer tube has gotten clogged, we can look into the HDM. Use the link in the ticket to go to the time and day of the problem. You will now be in the ‘graph’ tab of the system. (see image). Notice that only at a specific time of this process the “Transfer path” is colored ‘green’. This means that at that time the transfer is happening. Keep this in mind when looking at the graph.

Now to confirm that the transfer is clogged you can check if the T1 tank is lowering slowly during the transfer. Hover over a point in the transfer and check the value of T1 and T3. T1 should slowly lower over time. And if T3 has enough water to measure (starting at 70 points or higher) then T3 should raise up slowly over time. The Hydraloop might periodically push up T1 to keep the transfer working. Ignore this in your measurements. When the transfer is still slowly lowering T1, it is very likely that the transfer tube is clogged. As water still moves through it, but very slowly.

It might be that the transfer got completely clogged. In this case no water movement is happening at all. But it could also be another problem. To confirm it is still the transfer being the problem, the problem normally happens slowly over a longer time period. To see further back in history how the system transfer worked before, try jumping back to the previous transfers. There is an easy way to check this. Click on the ‘transfer path’ itself. Then to jump back in time to the transfer before this, press the ‘Active’ button (see image). This will bring you to the previous transfer. You can keep repeating this forever. If you notice the transfer used to move, but very slowly, then you know it has gotten completely clogged. Extra tip: Try comparing it to the transfer speed many months ago.

You can keep track on how far you have jumped back in time by looking at the time. See the image below

Solution
Go to the “Maintenance” tab and run the maintenance routine “Clean device parts”. Then select the ‘transfer cleaning’ parts only. And from there follow the instructions on how to clean the transfer tubes. Make sure all the tubes are cleaned for any clogging!
Be sure to run a the “Maintenance” routine “Transfer check” before leaving site. To confirm the problem has been resolved.
Transfer valve broken
Problem
The transfer valve itself can also be malfunctioning. The valve used to open/close the transfer path is made up of moving parts. A metal ball inside the middle of the water path. This is moved by cog wheels that is moved by a motor. When any of these parts fail, the valve no longer opens/closes. If this is the case, you will notice no water movement at all anymore during the transfer. To inspect this, see the instructions for the cause ‘Clogged transfer tubing’ above. The cause can also be a ‘Loose wire’.
Solution
Replace the valve. This is a blue motor valve. Labeled as x6 for the A side of the Hydraloop (H300 or H600). When the B side of a H600 is failing, x42 needs to be replaced. Please run the “Maintenenace” routine “Check working transfer” after replacing the valve to make sure the replacement was successful.
Loose wire
Problem
This will have the same effect as a broken valve. Often this loose wire is caused by the connector between the component and the wire not being secured well. These wires make contact with each other through metal. And if the metal does not touch each other anymore, no electricity can flow anymore to control the valve.
To be sure the cabling is the problem, please run the “Maintenance” routine “Check working transfer” for the correct side of the Hydraloop (A or B on H600). Then when this routine is running, use a multi-meter and set it to measure DC voltage. Put a probe on each side of the connector closest to the valve. If the transfer valve is open on that moment, you should measure 24 volt direct current (DC). If not, the wiring might be loose.


Solution
Try to fix the cabling. Or replace the cabling for new cables.
IO-board (water) damage
Problem
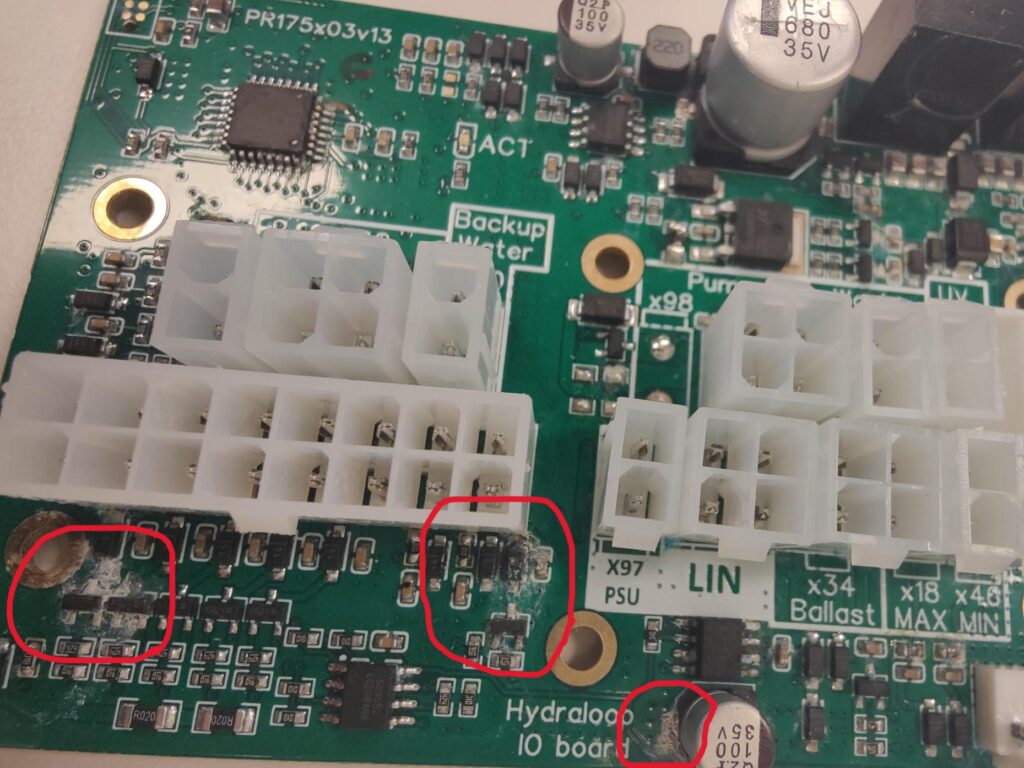
The IO-board that controls the Hydraloop can also be damaged. Often the damage manifests as valves or other components constantly being powered. Or not powering at all. The damage could be clearly visible (see below image of clear calcium marks from dried up water). But often it is not that easy to see.
Solution
Replacing the IO-board is the only thing that would solve this problem.