When the backup valve is stuck on only allowing to use T3 water, this has a few effects.
- First off, when the toilet and washing machine are used, and no recycled water is available (T3), the Hydraloop is unable to supply water to the toilet and washing machine.
- Secondly, the Hydraloop is unable to do self cleanings. For longer term this might influence the water quality of the Hydraloop.
Location #
The valve is located on a different spot for V1.X systems and V2.X systems. Please check the version of the Hydraloop in the hdm on the “Device” tab to confirm which one is applicable.
Location of V1.X systems
On the V1.X systems, the backup water valve is located directly under the transparent T4 tank. Two valves are connected together here. But the valve directly under the transparent T4 tank is the backup water valve.

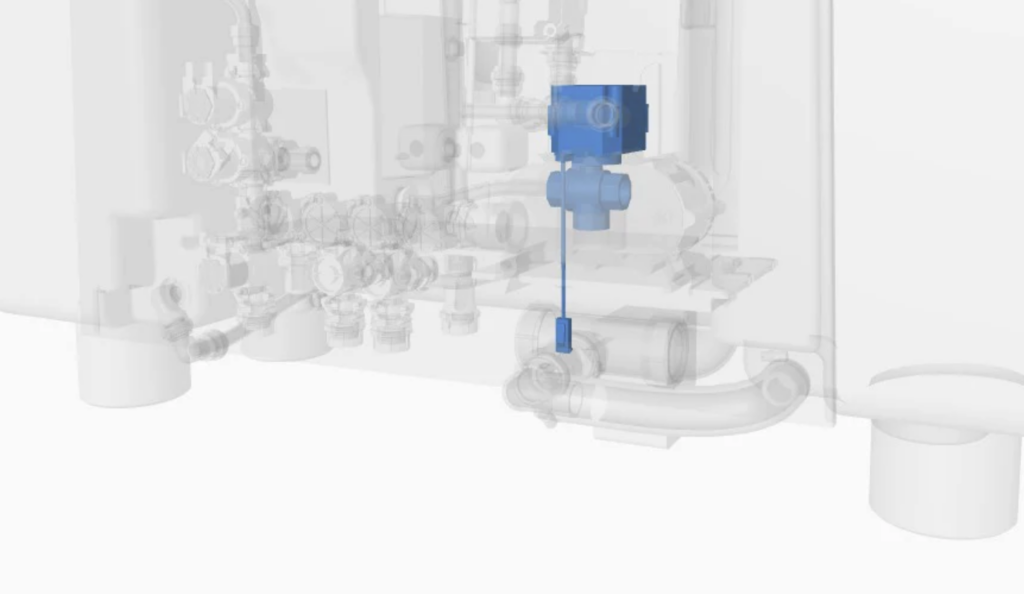
Location of V2.X systems
The location of the backup water valve is right behind the distribution pump. The valve has a blue casing. Please note that other valves have the same casing. But this one is specifically connected to the black ‘distribution pump’. See image.

Causes #
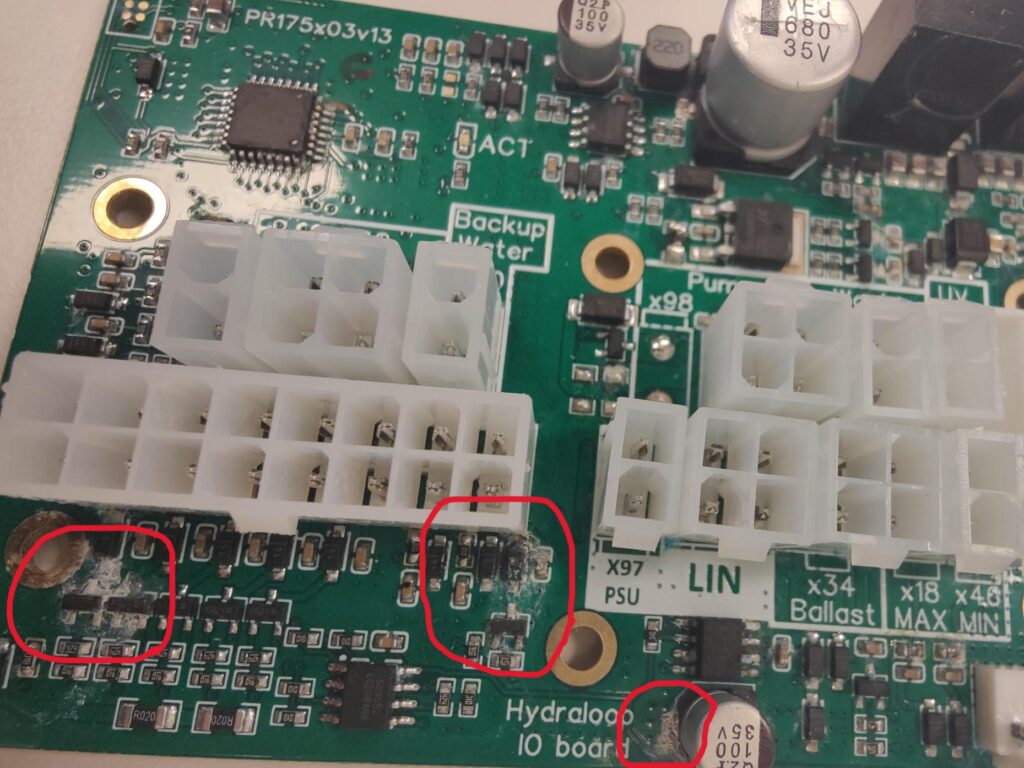
IO-board (water) damage
Problem
The IO-board that controls the Hydraloop can also be damaged. Often the damage manifests as valves or other components constantly being powered. Or not powering at all. The damage could be clearly visible (see below image of clear calcium marks from dried up water). But often it is not that easy to see.
Solution
Replacing the IO-board is the only thing that would solve this problem.
Component failure
Problem
Another possible cause is component failure. The component failure could be:
- Wear and tear
- Debris entered the valve assembly and damaged the valve
- Calcium buildup could get the valve stuck. This only happens if the system dries up. The valve should be under normal operation always wet.
The valve can also be stuck in an in-between position. See below photos of this wrong case.


Solution
WARNING: Make sure the new valve is installed properly. As the valve has 3 holes, it is possible to install the valve the wrong way around. Use the orientation of the previously installed valve as reference.
Replacing the valve would be the only solution. To replace the valve follow these steps:
- Make sure the T3 tank of the Hydraloop is emptied before performing this replacement. Use the HDM and run the routine in the ‘Maintenance’ tab, called ‘Empty T3’.
- Turn off the backup water towards the Hydraloop. (if not available, turn off the backup water of the house)
- Put a towel under the Hydraloop. (as a little bit of water will leak out of the Hydraloop)
- Disconnect the electricity wire of the valve first. (follow the wiring to the first disconnect point)
- Remove the couple pieces around the valve to disconnect it from the water pipework. (Screwed on V1.X. Push fit connections V2.X)
- Put in the new valve and connect back the electricity wire.
Testing
After replacing the valve, please test if the replacement was successful. The best way to currently test the valve is by:
- Filling T3 with enough water through the “Maintenance” routine “Fill T3 with backup water”. And use the number 100.
- If the filling succeeds, the valve is working for using T4 water.
- Then flush a toilet. T3 will drop in the graph view of the HDM. See example images below how to see this.
- No toilet connected to the Hydraloop to test with? Please contact Hydraloop support to check if the valve is working.

